Fatty tuna and Photoshop
The day started with me sleeping in (I was up late working on my blog entries) and then traipsing off to the market at place des fêtes, where I picked up a bunch of fresh veggies and fruit. At one of the fish stands, I noticed a platter piled high with thick, shiny, pinkish filets with a prominent sign saying "Today! Fatty tuna!!." This is a big deal. Fatty tuna is often one of the more hard-to-find and expensive varieties of sushi and sashimi. The flesh is much-valued for having the full flavor of tuna, but the softness of a more delicate fish and a higher concentration of fat, which turns to silky liquid in your mouth. The moment I saw it, I was sold. I bought a large filet (in retrospect, I should've taken the huge one on top; the price was so good), and decided to shop for the necessary ingredients for ceviche.
When I got home, I started to prepare the tuna for ceviche. My plan was to use the thickest 1/3 of the filet for a sashimi and rice dish (chirashi) that night, and then I would cube the rest of the fish and marinate it overnight for ceviche. One problem, though: the filet still had the belly-lining attached and my knives were dull as rocks. I didn't have a sharpener with me, so I just set about trimming off the lining as best I could.
It didn't go well.
The thinner parts of the filet were hopelessly mangled and went directly into the ceviche preparation (the overnight pickling makes the flesh a bit firmer). I managed to get two 2cm-wide strips of solid meat for the sashimi that night. The rest went to the ceviche as well, although I spent far too much time trying to trim the remaining belly-lining while fretting about the "wasted" meat that fell away with the belly lining. Ah well.
Either way, the tuna sashimi was great. I emailed DJ and invited him to lunch the next day to eat my ceviche, and then tossed the ceviche mixture in the fridge to marinate overnight.
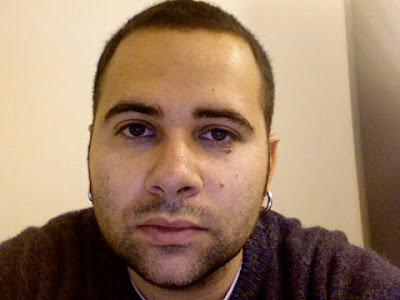
I spent most of the rest of my night working on a particular task. I'm still working on building an "artist" MySpace page in their Music section, and I decided this morning that I needed a picture that was less banal than this:

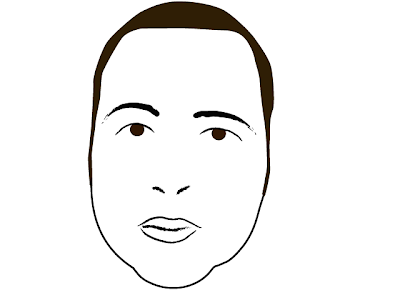
So, with the magic of photoshop I made this:

Here's what I did:
- In a blank photoshop project (with the artboard clipped to the size of the original image), I inserted the original image (File --> Place...).
- I then "froze" the layer with the picture and named it "Background" (in the Layers window).
- From there, I created new layers for the various parts of the face (e.g., eyes, hair&jawline, mouth, nose) and started tracing over the original image
- I mostly used very simple lines created using the Pencil tool or the Pen tool, modifying the lines with various Brush sets for the desired effect (take a look at the eyebrows and mouth for good examples).
- For the hairline, I traced a complex curved polygon with the Pen tool, simplified the lines afterwards (Object --> Path --> Simplify Path... ), and then filled it with a chocolate brown shade to match my irises (which are simple circles).
- I would occasionally "hide" the Background layer (the little eyball next to each layer), so that I could see what the finished product would look like.
- Don't worry about slightly altering shapes to make things look a bit better. When I traced the outline of my lips perfectly, the line drawing looked like I had huge Betty Boop lips (well, I have big lips, don't I?). So I smoothed out the notch at the centre of my upper lip and things looked more proportional.
Alright, that is all! I really need to get back to work.


Aucun commentaire:
Enregistrer un commentaire